My dd set up her own herb shop. She sold fresh mint, cilantro, rosemary and parsley from our garden. She enjoyed explaining recipes and cooking tips for the fresh herbs; "Rosemary is delicious with a lemon juice and olive oil marinade for chicken, or you could try my brother's rosemary bread." A neighbor gave us lavender from her gigantic bushes which my daughter dried, stripped and put into cute little sachet bags she made herself. Of course she could describe the relaxing properties of a lavender bath.
 |
| Lavender Sachets |
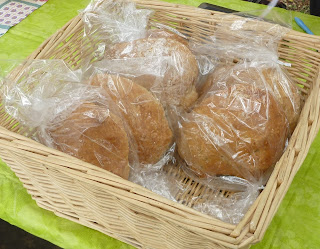
My ds and I made rosemary artisan bread. These loaves were a big hit and quickly sold out. Customers were easily lured with free samples to dip in Balsamic vinegar and oil, and a cute, attentive sales boy.
 |
| Rosemary Artisan Bread |
You can find many artisan bread recipes online, but I had to fiddle with a few to find one that worked for me and my climate. I found the differences were not so much in the ingredients as in the baking method. Here is what I did, but you may need to tweak it some more for your own needs.
Rosemary Artisan Bread
Makes 4 small boules
6 1/2 cups flour
1 Tb salt
1 1/2 Tb yeast
3 cups warm water
2 Tb chopped fresh rosemary
Mix all ingredients together in a large bowl. Make a nice ball of dough, being sure to mix in the flour as best you can. This is the only time you mix or knead the dough. Loosely cover the bowl with a lid and let the dough sit for at least 2 hours, up to 12 is okay. After the first rise (the 2-12 hour thing) scoop out 1/4 of the dough with your hands. You can grease or flour your hands to prevent sticking. Very quickly and without kneading or unnecesarily smashing the dough, plop it onto a prepared baking stone or cookie sheet. You can shape the dough a little bit, but avoid smashing the air bubbles as much as possible. A prepared stone is sprayed with olive oil and dusted with cornmeal. This will prevent the bread from sticking to the stone. Then, let the dough rise again, for about 40 minutes to an hour. If your kitchen is cold, it will take longer. The dough should double in size.
Preheat your oven to 450F. This is hot! So make your arrangements in the oven before you preheat. I put one rack on the lowest level and one on the highest level. On the high rack, place a small oven proof container with one cup of water in it. This will create steam in the oven and make the dough chewy in the middle, but crusty on the outside. Refill the water with every loaf you bake.
I tried other methods involving parchment paper, water on the bottom of the oven, etc. and none of them worked as well. Let me know if you try this and what baking methods work best for you.
This post is part of Kelly the Kitchen Kop's Real Food Wednesdays.


2 comments:
What a great idea for a fair. Both booths look great.
What fun! I would have been their customer for sure!
Post a Comment